1:25 AM How Replace HP Keyboard without go service center |
How Replace HP Keyboard without go service centerSince I recently had to replace a keyboard on a laptop, and couldn’t find any resources on replacing it for this model, I thought I’d go ahead and do a run-through for anyone else who may need this Okay, to start with, you’ll need:
Step 1: Remove RAM cover and Battery
Use your Phillips screwdriver to remove the two screws securing the RAM cover, and set it aside. Then remove the battery as well.
Step 2: Remove Necessary ScrewsThere are a total of eight screws that you’ll need to remove to get to the keyboard: Five black screws, and three smaller silver screws.
You’ll see a keyboard icon next to the three lower screws:
And these are what you should end up with after removing the screws. Step 3: Remove Keyboard Shield
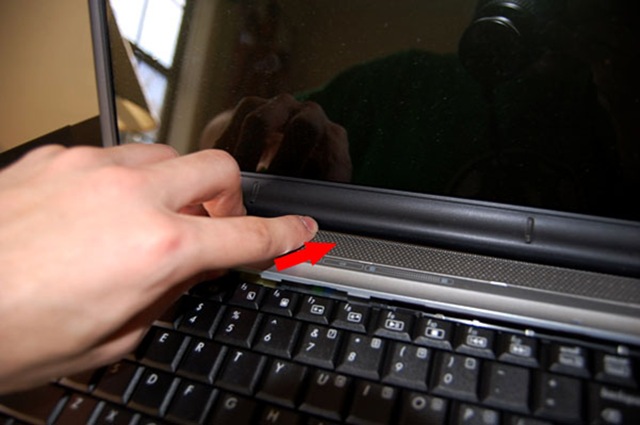
Next, we’ll have to remove the shield that holds the keyboard in place. You can do this using the Flathead screwdriver, fingernails, or a coin.
You’ll pop them up like the image above on both sides.
Once you get the cover up, be careful not to damage the flex cables beneath it. Step 4: Remove Keyboard
Now that you have the shield loose, you can now remove the keyboard. There is another flex cable connecting the keyboard, so don’t pull too far up on the keyboard just yet.
Carefully work the cable out of its slot by pulling back towards the screen.
Now you’ve got the keyboard removed, and you’re ready to reinstall the new one. Almost there!
Step 5: Install the New Keyboard
First, carefully insert the new cable into the slot. Be careful not to damage it, the cables are fragile. Update: "The connector slot has a lever the pins are connected to the white box and the black lever at the bottom of the white box can be pulled towards the screen. This will loosen the keyboard cable. If you press that black lever back it will fix the cable.” Thanks, alex for the tip!
Now, place the keyboard back down inside the case.
Now we’ll replace the shield. Push backwards toward the screen to make sure the back latches set in place correctly, then pop the sides back down into the case until you feel them lock.
Step 6: Close It All Back UpNow that you’ve got the keyboard back on, flip it back over onto its back, and reinstall all eight screws.
Don’t forget, the three small screws go here, under the battery.
Now, we’ll put the RAM cover back on…
…and put the battery back in. And that’s it! As long as you’ve got the cable plugged in correctly, it should work with no problems.
|
|
|


| Total comments: 0 | |